Trying to catch up…roasted red pepper, basil, chicken pizza

I have a backlog of cooking events, and I am only going to catch up on some of them.  This is one, a pizza that just really rocked.  My wife said it rocked….and you know Laura knows what is up.  I know I just said I just had the rockingredpepperpie pizza…and it was amazing…but this crust was a new approach, a Sicilian crust.  Semolina flour and lemon juice to make the glutens.  It was tasty and AWESOME!  Thin and crispy…just a fun crust.

So some great ideas from this pizza….grilled lemon basil chicken thighs.  That in itself is not so interesting…it is a great idea for grilled chicken on pizza that tastes so delicious

The idea is to partially thaw some chicken thighs….and marinate them while still pretty frozen. Grill them while still partially frozen.  Slice in strips to put on pizza.  Because the chicken is still somewhat frozen, you end up with cut chicken that is still uncooked in the middle, but with a grill flavor.  Toss that on your pie and it will cook to juicy perfecting.

Another thought is grated Havarti…it melts like heaven and tastes as good.  Mixed with some grated, real Parm and you have cheese heaven.

Finally, work on parchment on your pie…makes it easy to slide on the stone and just is easy to work with.

Pizza is so awesome….to my special friends…let’s rock the Pizza!

Potluck with our special friends…

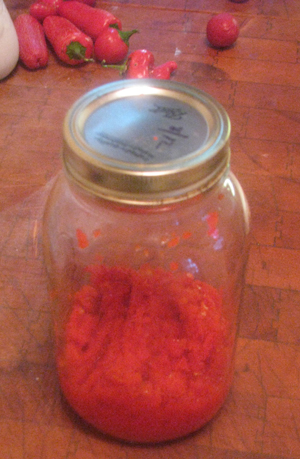
I am reaching a point where my blogging is falling behind my cooking.  I have a wonderful day job, and when I get home and on weekends, I just cook up a storm.  So now, I have a backlog of things to write about…and not enough time to write them all down.  I am behind 2 pizzas, tomatillo enchiladas, canned tomato sauce and fermented peppers, and red roast pepper enchilada sauce.  And, as my wonderful wife Laura will attest to, I can’t do it simple…want hot sauce…make your own….by the gallon (and ferment it for a year)….want roasted enchilada sauce…go to garden, pick peppers, roast, and go from there…really, I love making this stuff.  I love working with great, fresh ingredients.  While this makes for great food…it is a somewhat time consuming approach to cooking.  Makes me begin to have an inkling of what it was like to make all food from scratch.

So when our special friends called over the weekend and said lets make dinner and hang, I potluck
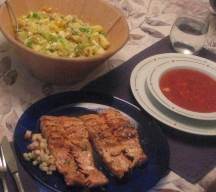
was all in. ‘Cause who doesn’t love making food and hanging?  Just to be clear…I don’t mean special in that special needs kind of way….more like fully appreciated.  Once again…you know who you are!

Still, I am falling behind and want to keep this blog current with my thinking and cooking.  So here it is…Grilled salmon with a lime-mint drizzle and spicy pear-mint salsa, garden gazpacho and no mayo potato salad (we have a strict prohibition on mayo here).

Potlucks can be dicey events.  Of course, with our special friends it is more a cook-off than a worry.  In the dream of perfect potluck tradition though, our contributions were greater than the individual parts.  This was a garden celebration dinner of freshness and lightness.  Rob and Michelle made the potato salad, my sweet wife Laura made the gazpacho, and I was on salmon and salsa.  I will post their recipes if they write them down for me, because having eaten them, I can attest to the fact that this dinner worked together visually and on the palate!

Grilled lime-mint salmon with spicy pear salsa

  • Salmon filets, skin on
  • 1 lime, zested and juiced
  • handful of mint leaves
  • olive oil
  • salt
  • pepper

Pear Salsa

  • 1 ripe pear, cored and diced
  • one hot pepper (or appropriate heat portion), seeded and finely minced
  • some lime juice and zest from above
  • some finely chopped mint from above
  • pinch of organic sugar

Carefully rinse salmon, pat dry.  Mix half of lime juice, half mint, pinch sugar, hot pepper to taste, and some salt and pepper in a marinating dish. Taste and adjust.  Put salmon filets in skin side up and marinate for 1 hour.  Heat coals, and well oil grate or oil tin foil.  When coals are glowing, put on oiled grate or tin foil, skin side towards heat, over direct heat.  Reserve marinade next to grill.  Cook 2 minutes.  Spray a little extra oil on top to keep from sticking, the flip to flesh side down.  Cook 1 minute and do finger test for doneness.  Turn over once more, brush with reserved marinade and cook one more minute.  If the finger test feels right, remove from grill, tent with tin foil and let sit for a few minutes.  Prepare salsa in the meantime.

To prepare salsa, put diced pear, rest of mint and lime juice and zest, and another pinch of sugar in a bowl.  Add hot pepper to taste, trying to keep the pear and mint up in front.  You just want a hint of heat.

Remove skin from salmon and set on plates.  Heat left over marinade and drizzle over salmon, adjusting as needed.  Spoon pear salsa over salmon filets on the plate.  Serve with awesome gazpacho and potato salad..Eat, Laugh and Enjoy…Peace
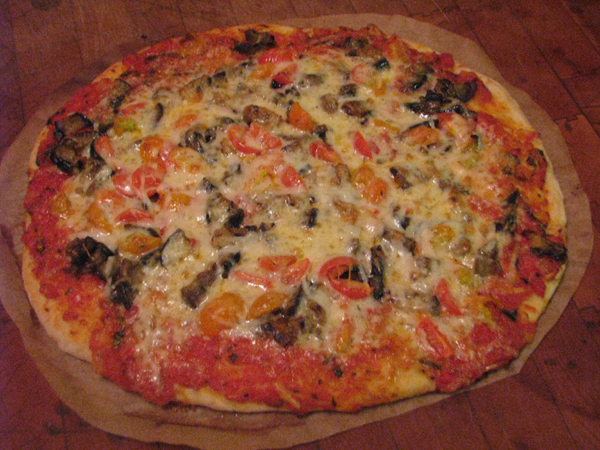
Labor Day Red Pepper Mash!

mashOK…so it is Labor day…and I have a bunch of habaneros waiting to be processed.  A match made in heaven!  The red of the habs compliments the day nicely!  HAHA.  Power to the people!  What could be more a compliment to labor than making real honest hot sauce that is unabashedly red.

So, I get it…this jar looks…a little empty.  But fear not.  This is my starter that I will keep working more habs into as they ripen.  Given the number of chilies I expect….this jar is going to look small soon.

Now, I know that my hab pepper mash may not impress some friend of mine who just randomly bites into ghost chilies.  She is in a class by herself.  Nonetheless, the habanero is the queen of peppers.  The perfect mixture of heat and flavor.  Cut open a habanero and no other chili smells like it.  It smells…buttery.  Habs are sexy…they smell sexy…they entice you with their ways.  And they will kick your ass.  They have serious punch.  You will love every minute of it.

Hilariously, the cat hates when I process habs….I mean…I turn on the fans and hood…but he just wants nothing to do with the kitchen when I am dealing with them.  Which is amazing…because the kitchen is food bowl central…and NOTHING IS MORE IMPORTANT THAN FOOD BOWL!  Silly cat has no sense of the divine of the habanero!

Fermented foods are among our first methods of food processing and preservation.  They  create awesome, beneficial micro-organisms that we love and need, among their other benefits.  Nearly all sauerkraut and pickles these days are made with vinegar, rather than lacto fermentation.  While I love vinegar pickling, fermentation is healthier. So not only is making fermented pepper mash completely tasty..it is good for your gut.

Fermented pepper mash

  • Mason jar, appropriately sized
  • peppers, your choice
  • salt
  • time

Seed peppers if you want, leaving the hot membrane in.  Weigh seeded and de-stemmed peppers and add 6% of that weight in sea salt.  Put peppers and salt into food processor and pulse until pureed. Don’t just leave the blade spinning, because friction creates heat, and heat kills the little guys you want to ferment your peppers.

Also, you can sterilize the mason jar…if you are a freak.  But let it become completely cool, for the reasons above.  See, fermentation was among our first forays into food preservation.  Do you think we sat around and sterilized mason jars?  Fermenting works because it is in harmony with our natural world and our bodies.  Don’t try to go all antiseptic on this.  Instead, go with the flow.

So, you got to love the ingredient list.  Not only are the ingredients simple…but hey…they are CHEAP!  OK…maybe time isn’t cheap..but the rest are.  The beauty of pepper mash is that it becomes more complex with time fermenting. …kind of like wine.  You ever read the blurb on the back of that Tabasco bottle?  It says aged three years in oak barrels.  You read the ingredients?  Same as mine…oh I know it says vinegar..but that is added at the finish.

From the Tabasco website “After the peppers are picked, they are mashed and then mixed with a small amount of Avery Island salt extracted from the salt mines that lie beneath the Island. The pepper mash is placed in white oak barrels, and the wooden tops of the barrels are then covered with more Avery Island salt, which acts as a natural barrier to protect the barrels’ contents. The mash is allowed to ferment and then age for up to three years in the McIlhenny warehouse.”

Fermenting is simple, ancient and delicious.  And while I like Tabasco…nothing beats the hab!  So to Tabasco and Emeril…I got your BAM!

Pizza Heaven….Grilled Eggplant Pizza in Basil Tomato Sauce

In my opinion…pizza is the hardest of foods to perfect, and the most amazing of foods.  Pizza is at once elegant and casual, complex but accessible.  Great pizza is great technique combined with working fast.  Many of my favorite foods have this combination.  Pad Thai comes to mind…and I have been working on that as well.

Tonight…I had a great night.  This pizza just sang.  This pie was based on so many pie2ingredients that were either grown in our garden, or a friends. Home made tomato sauce from garden tomatoes with a little pepper mash added for zest, topped with basil, cherry tomatoes, and grilled eggplant all from gardens, with dill Havarti which just melted so wonderfully.

But the crust..and the combo….was just right on.  Crisp on the bottom and edges, with a soft thin bread interior, and that sweet mix of tomato sauce, cheese and crust blend.   All those fresh ingredients made for a wonderfully fresh pie.

Pick a peck….

Laura and I went out yesterday to the garden and picked a boat load of peppers (actually she picked a boatload of cucumbers but that is a different story).  I am reserving the first ripened peckahabaneros for pepper mash.  But I had lots of Hungarian carrots and hot cherry peppers to use as well…what to do?  Well, pickle those suckas….or peppas…or chiliez…you know what I am saying.

Now these chilies are not crazy hot…ranging between 5,000 and 15,000 scoville units…(I said unitz).  Personally, I think my chilies are on the middle to low end of that scale.  They have a little kick…but not enough to really notice.  Perfect for friends who have chili challenged palates.  Trainers…as it were.  Pickled you can add them to salads and dinner and appetizers as a little zaz!

I also made a little minced mash…salt, minced chilies and a little lime juice..this will come up in subsequent posts…so pay attention!.

Pickled Peppers

  • whole peppers, stems trimmed to a quarter inch, punctured 3 times with a sharp paring knife
  • 4 peppercorns per pint jar
  • 1/2 a bay leaf per pint jar
  • 2 small garlic cloves per pint jar
  • small pinch of whole cumin seed per pint jar (6-8)
  • Vinegar, 2/3 cup per pint jar
  • Water, 2/3 cup per pint jar
  • Pickling salt, 1/2 tsp per pint jar

So why the pint jar measuring standard?  These are cold pack pickles.  You are going to sterilize your mason jars, put the peppers and the spices in, add the brine, seal and then process in a canning boiler for 10 minutes.  It just seems easier to tell you what you need per pint rather than per pound of peppers…nice alliteration!

Once the jars have been sterilized, let cool a bit and add garlic, peppercorns, cumin seed, bay leaf and peppers.  Try to really stuff the peppers in without breaking them or crushing them, remembering to leave some head room.

Get the canning boiler going….actually…you should already have it going from the sterilization.  Put lids and rims in sauce pan of hot tap water.  To make the brine, put water, vinegar and pickling salt in a sauce pan and bring to a boil.  Once it hits a boil, fill your packed mason jars with brine, leaving half inch of headroom.  Wipe edges of mason jars and tighten lids to just tight.  Put mason jars into boiler and bring to a boil.  Process ten minutes from boil.

Remove from boiler and set on counter to cool.  Store in cool, dark location until ready to eat!